Moving? Here’s How to Ensure Your Range Hood Makes It to Your New Kitchen Intact
In this guide, we'll walk you through the steps to protect your range hood during a move, from disconnecting it to reinstalling it in your new home. We'll cover everything you need to know, including the tools you'll need, safety precautions, and tips for a smooth transition.


A powerful range hood is essential for keeping your kitchen air clean and free of unwanted cooking odors and grease. However, these appliances can be delicate, and moving them can be a challenge. With a bit of planning and the right approach, you can ensure your range hood arrives at your new kitchen in perfect working order.
Shop Powerful Range Hoods
From HAUSLANE
Why is it Important to Protect Your Range Hood?
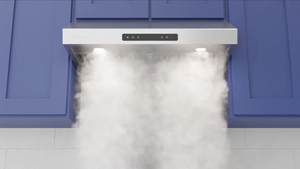
Your range hood is a valuable investment that does more than just keep your kitchen smelling fresh. By trapping grease particles and eliminating fumes, it ensures a cleaner and healthier cooking environment. The easy-to-clean stainless steel surfaces and dishwasher-safe baffle filters make maintenance a breeze, contributing to a more enjoyable cooking experience.
Remember, range hoods have delicate parts. These parts can easily be damaged if not handled with care. Protecting your range hood during a move can save you from costly repairs or replacements, helping it last longer and keep your kitchen clean and healthy.
Preparing Your Range Hood for the Move
When it comes to moving, your range hood is an essential appliance that requires special attention. Proper preparation can ensure that it arrives at your new home in perfect condition, ready to provide cleaner air and a healthier cooking environment. Here's how to prepare your range hood for the move:
Disconnect and Clean
First, safely disconnect the range hood. Turn off the power at the circuit breaker to avoid electrical hazards. Then, carefully detach the range hood from the wall or cabinet, taking care not to damage the surrounding surfaces. If you're unsure about disconnecting it yourself, consult the user manual or seek professional help.
Once the range hood is disconnected, give it a thorough cleaning. Start by removing the baffle filters, which are usually dishwasher safe, and wash them well. For the exterior, simply wipe it down with a streak-free cleaner, especially if the range hood is made of stainless steel. Cleaning before the move helps prevent grease and grime from spreading to other items and ensures that the range hood is ready to use in your new kitchen.
Secure Loose Parts Before packing your range hood, remove any detachable parts like filters, grease trays, and light covers. These components are delicate and can be damaged during transit. Pack them carefully in a separate box, using bubble wrap or foam for protection. Label the box clearly to find these parts easily when reinstalling the range hood.
If your range hood has any glass components or other fragile elements, consider wrapping them individually in protective materials. This extra step can prevent scratches, dents, or breaks, ensuring that your range hood remains in top condition throughout the move.
Protect the Exterior
To protect the exterior of your range hood, start by wrapping it in bubble wrap or a thick moving blanket. This will shield the stainless steel surface from scratches, dents, and other potential damage. Secure the wrap with packing tape, making sure not to apply tape directly to the surface to avoid leaving residue.
If the range hood has crown molding or other decorative elements attached, take extra care to protect these as well. You might want to use additional padding around these areas to prevent them from getting chipped or cracked during the move.
Pack It Properly
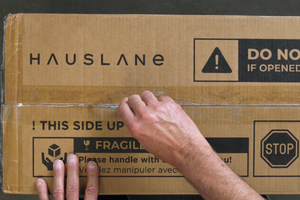
Choosing the right box is crucial when packing your range hood. Look for a sturdy box large enough to accommodate the unit but not so big that the range hood has room to shift around. If possible, use the original packaging, as it’s designed to fit the range hood perfectly. If the original box isn't available, a heavy-duty moving box with ample padding will do the job.
Stuff all the empty spaces in the box with fillers. Use foam peanuts, bubble wrap, or crumpled paper. This will prevent the range hood from moving during transit. Properly seal and label the box as "fragile." This will ensure careful handling by the movers.
Transporting Your Range Hood
Handling with Care
Proper planning is needed to transport large appliances like your range hood. Whether it’s a wall-mounted or sleek under-cabinet range hood, careful handling is essential to prevent any bumps or impacts that could damage it.
When packing up your kitchen, carefully wrap your range hood in protective materials. Protect its finish with moving blankets or bubble wrap. This applies whether you have a stainless steel, black stainless steel, or copper range hood.
Remove any detachable parts, such as the baffle filters, and pack them separately to prevent scratches or dents.
Secure Placement in the Moving Vehicle
Once your range hood is properly wrapped and ready to go, the next step is to secure it in the moving vehicle. The key here is to minimize movement during transit.
Consider placing the range hood towards the back of the moving truck or van, where it’s less likely to shift. If possible, position it between other large, sturdy items like a solid wood dresser or packed boxes to keep it from sliding around.
If you have a larger model, like an island range hood, ensure that it’s lying flat and supported on all sides. For smaller models like a 30-inch or 36-inch range hood, make sure they’re not stacked under heavy items that could cause damage.
Consider Professional Movers
If moving your range hood seems overwhelming, consider hiring professional movers. They are experienced in handling the shape and weight of kitchen range hoods, which reduces the risk of damage. They also have the proper tools and techniques when loading and unloading your range hood safely, whether it's convertible or ducted.
Although hiring professionals might be more expensive, the peace of mind knowing your range hood will arrive intact and ready for installation in your new kitchen can make it worth the extra cost.
Reinstalling Your Range Hood in Your New Kitchen
Professional Installation
Hauslane range hoods can be installed through DIY installation. Every range hood order includes a user manual with a step-by-step installation guide. Customers can also find plenty of installation tutorials on the company blog and YouTube channel. However, if you aren’t comfortable with doing the installation yourself, hiring a qualified technician is usually the best choice.
Professional installers are skilled in handling these installations. They ensure your range hood is mounted securely and functions at its best. They will connect the blower to the ductwork and align the hood perfectly with your stove.
DIY Installation Tips
If you’re comfortable installing the range hood yourself, follow these key guidelines for a smooth process.
First, gather all necessary tools and parts before you start. This includes a drill, screws, and any mounting hardware provided by the brand.
For a ducted range hood, check that the ductwork is aligned and free of obstructions. If you have a ductless or convertible model, ensure the charcoal filters are installed correctly to trap smoke and odors.
Safety is crucial during installation. If the range hood needs to be mounted on the ceiling or high above your stove, use a sturdy ladder and have someone help you. Always turn off the power at the circuit breaker before connecting any electrical components.
Proper Mounting Height
One of the most important aspects of reinstalling your range hood is mounting it at the correct height above your cooktop. The ideal height varies depending on the model and the type of stove you have. Still, a general rule of thumb is to install the range hood 24 to 30 inches above the cooking surface. Mounting it too low can result in heat damage to the hood while mounting it too high can reduce its effectiveness at capturing smoke, steam, and grease.
The correct height for wall-mounted range hoods ensures that the ventilation system can efficiently remove airborne particles and maintain a clean cooking environment. If you’re using a range hood with a powerful CFM (cubic feet per minute) rating, proper height adjustment is crucial to maximize its suction capabilities and minimize noise levels.
Testing and Troubleshooting
Once your range hood is installed, it’s time to test it out and make sure everything is working as it should. Start by turning on the fan at various speeds to ensure that the blower operates smoothly and without excessive noise.
Check that the lights are functioning and that the touch controls respond properly. If you notice any issues, such as weak suction or unusual sounds, double-check the installation to make sure everything is securely connected.
If you’ve installed a ducted range hood, ensure that the vent is unobstructed and that air is flowing freely to the outside. For ductless models, verify that the charcoal filters are correctly in place and effectively trapping odors. If problems persist, don’t hesitate to consult the user manual or reach out to the brand’s customer support for assistance. Many range hoods come with a warranty, so you may be able to resolve issues without additional costs.
Safe Travels for Your Range Hood
Moving can be stressful. However, with some planning and effort, you can make sure your range hood arrives at your new home safely. Remember to disconnect and clean it thoroughly, secure any loose parts, protect the exterior, and pack it properly for transport.
By taking these precautions, you'll avoid costly repairs and continue to enjoy the benefits of a clean and healthy kitchen.


