The Best General Range Hood Installation: Video Guide in 7 Steps
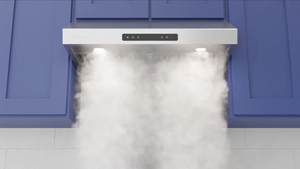
Got a new range hood? Say hello to better ventilation, reduced heat and humidity, and better air quality. But first, you have to install it! Fortunately, we have a comprehensive guide on how to install any oven range hood vent yourself. You can also check out the video guide for more help.

1. Identify the Location for the Range Hood Vent

Ensure that there is a vent path previously installed in your home.
Ideally, the vent path should lead up into the ceiling and out above a backyard or deck. If necessary, create an opening in the wall for the vent. Note: some range hoods come with a top mount option, but we're focusing on a back-end mount for this guide.
(Need to install a range hood through the ceiling? We have a step-by-step guide for that too!)
2. Prepare the Range Hood

Before installation, unbox your range hood vent.
Typically, it comes with a circular vent for a top mount or a rectangular vent for a back-end mount. For this guide, we'll be using a rectangular vent. The manual provided should guide you on how to unscrew the vent caps and the metal plate that's covering the fan to reveal the mounting on the backside.
3. Mount the Range Hood

Measure the distance from the top of the hood to the bottom of the cabinet above it.
You should also mark the spot where you will feed the power cable from the hood into the junction box in the cabinet. Next, unscrew the underside of the hood and enlist help to hold it against the wall. Draw an outline on the wall to mark the shape that you'll need to cut out for the vent.
4. Finalize the Vent Placement

The range hood should fit flush against the wall, with the vent peice going into the wall.
The hood should be level with the cabinet bottom. Once it's in position, mark the spots for the holes that you'll drill into the underside of the cabinet. Remember, you can only do this after ensuring the vent peice fits properly into the wall.
5. Set Up the Electrical Connection

There are two options for the electrical connection:
You can either hardwire the range hood by feeding the cable into the junction box and connecting the wires with wire nuts, or you can install an electrical receptacle in the cabinet and simply plug in the range hood.
6. Secure the Hood

With the vent in place, feed the power cable through the hole drilled earlier and align the hood with the wall.
Secure the hood with screws into the marked spots under the cabinet. Once mounted, connect the wires to ensure everything works correctly. If all is working well, finalize the installation by securing the hood to the wall and cabinet using the provided screws.
7. Wrap Up the Installation Process

Finish off by reinstalling the vent covers, filters, and any other pieces removed during the process.
Test the lights and fans to ensure they are functioning correctly. Do not forget to tighten any loose screws or rivets to avoid any annoying vibrations when the hood is in use.
And there you have it! You have successfully installed your oven range hood vent. The process should take roughly an hour if you follow these steps carefully. Enjoy your new hood and the benefits it brings to your kitchen.


