How to Install Hauslane’s Chef Series UC-PS18 Under Cabinet Range Hood
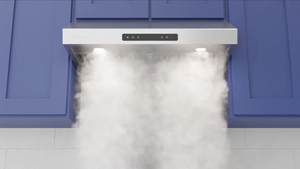
The UC-PS18 range hood delivers a contemporary design and professional performance. The under cabinet design makes it simple to install and a great choice for replacing an over-the-range microwave. Below you’ll find the steps and tips you need to install the PS18 range hood and start enjoying a brand-new cooking experience.
What We'll Cover:


Gather Necessary Tools and Supplies:
- Pencil
- Protective eyewear
- Gloves
- Measuring tape
- Aluminum Foil Tape
- Drill driver
- Jigsaw
- Oscillating multi-tool
- Drywall saw
- Tin snips
- Expanding spray foam
- Sandpaper to smooth out cuts
- Stainless steel bolts 1/4 inch by 1.5 inch or suitable screws and washers
- Drywall putty to fill holes
- Bins, styrofoam blocks, and a piece of plywood to raise or prop range hood
- 6 inch elbow duct
- 6 inch connecting duct
Prepare the Area:
1. If you have an over-the-range microwave, unplug, unscrew, and remove the microwave. There are support brackets behind that hold its weight.
2. Make a note of the ductwork behind the cabinet (size and shape) and clean up the area if needed.
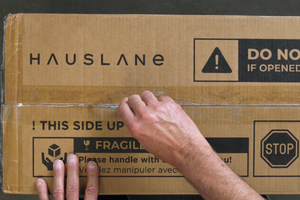
3. Unbox the range hood and review the manufacturer’s guide.
4. The PS18 range hood has two ducting options: 3X10” rectangular and 6” top circular.
5. How you install the range hood will depend on the ducting option you choose. We will use the 6” top circular for this example.
Measure and Mark:
6. Measure and mark a 6.5” circular hole.
7. Drill a small hole and cut it with the jigsaw.
8. Cut a hole for the power cord to go through.
9. Test to see if the duct will fit through the hole. Trim hole if necessary.
10. Mark a 6.5” octagon in the target location and cut with an oscillating tool. This is easier than cutting a circle and will give you a little extra room for duct installation.
11. Check the size of the duct and see how it would sit in the hole.
12. Drill a hole into the duct and use snips to cut out a 6” circle in the center.
13. Use painter's tape to cover the edges and foil tape to secure about 1” of the vapor barrier to the inside of the wall duct.
14. Be careful of sharp duct edges.
Install the Range Hood:
15. Install a duct collar in the hole in the wall. You may need to customize and cut it to size to fit the elbow.
16. Install a 6” collar after cutting to size to fit over the 6” gap to close the gap if the elbow is not long enough.
17. Use plywood board and styrofoam blocks to prop up the range hood. Be sure careful not to scratch the underside of the range hood. You can use painter's tape to protect the sides of the cabinet.
18. Raise hood with a helper or two.
19. Connect the elbow to the connector in the wall.
20. Secure with the bolts.
21. Ensure that the elbow is taped to the top of the hood through the hole.
22. Install baffle filters and oil tray.
Be sure to check out Kamlesh Pandya’s UC-PS18 range hood installation guide for a closer look at the process.
Secure and Test Functions:
23. Foil, tape and spray foam to seal any gaps.
24. Plug in range hood and test functions.
25. See how to set the time on your new range hood thanks to DO IT YOURSELF ITS EASY on Youtube.


