How to Install a Built-In Range Hood in 8 Steps by Hauslane
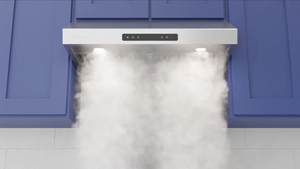
Cooking causes smoke, odors, fumes, and grease to accumulate in your kitchen. Range hoods are essential for eliminating away those fumes and smoke while snagging messy grease; and did you know that a built-in range hood is one of the most popular options for range hoods? This is due to its low profile and streamlined appearance. Fortunately, installing built-in range hoods is a straightforward process. In this guide, we'll walk you through the step-by-step process of installing one in your kitchen.


Shop Built-in Range Hoods
From Hauslane
What You'll Need for Installation
Gather the following materials before installing your built-in range hood:
- Built-in range hood
- Ductwork (if applicable)
- Screwdriver
- Measuring tape
- Pencil or marker
- Level
- Drill
- Wall anchors (if needed)
- Mounting hardware (provided with the range hood)
- Electrical wiring and junction box (if necessary)
- Safety goggles and gloves
Step 1: Choose the Right Location
Start by selecting the ideal location for your range hood. It should be centered above your cooktop or range, and positioned at a height that allows for effective ventilation. We recommend leaving 24 to 30 inches of space above an electric stove top. For a gas range, you’ll need 30 inches. Make sure there is enough space between the hood and any cabinets or other fixtures to avoid obstruction.
Step 2: Prepare the Mounting Area
Using a stud finder, locate the studs in the wall where you plan to install the range hood. Mark a centerline of where you’ll place the range hood and measure the distance between the studs to determine the exact location for the mounting screws. If there are no studs available, you'll need to use wall anchors to provide additional support.
Step 3: Install the Mounting Bracket
Attach the mounting bracket to the wall using the provided screws. Make sure the bracket is level by using a bubble level. Double-check the measurements and alignment to ensure accuracy.
Step 4: Connect the Ductwork (if applicable)
For ducted range hoods, you need to connect the ductwork before moving on to step five. Follow the manufacturer's instructions to install the ductwork, and make sure you have a secure, airtight connection.
Have a ductless range hood? Check out our guide for installation.
Browse Ductless Range Hoods
From Hauslane
Step 5: Secure the Range Hood
With the help of an assistant, carefully lift the range hood and slide it onto the mounting bracket. Ensure that the hood is centered and aligned properly. Secure the hood to the mounting bracket using the screws provided.
Step 6: Electrical Wiring (if necessary)
If your range hood requires electrical wiring, consult a professional electrician to handle the wiring and install a junction box if needed. Always make sure that the power supply is turned off before making any electrical connections.
Step 7: Test and Adjust
Once the range hood is securely installed, turn on the power supply (if applicable) and test the various functions to make sure everything is working properly.
Step 8: Clean and Maintain
Regular cleaning and maintenance is essential for keeping your range hood in tiptop shape. We have several guides to help you do just that:
- How to Clean a Range Hood Filter
- How to Clean a Stainless Steel Range Hood
- How to Use the Auto Steam Cleaning Feature on Your UC-PS38 Range Hood


